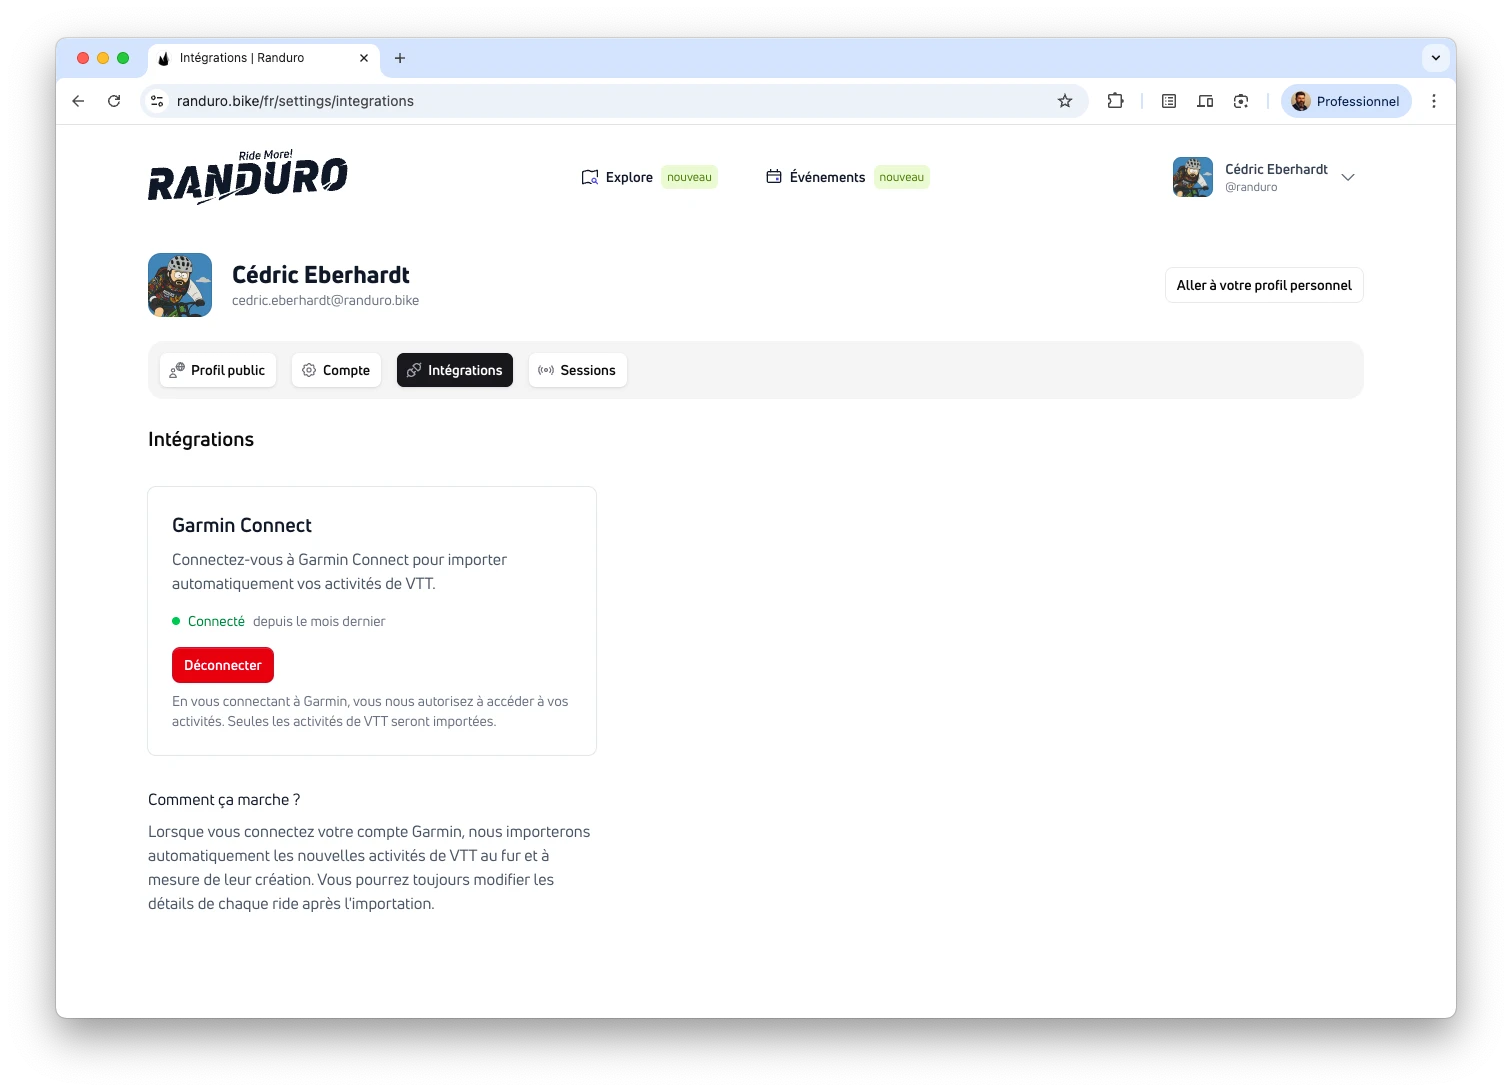
Integrations
Connect Garmin for automatic imports and upload GPX/FIT files from any GPS device.
Bring your data into Randuro your way: connect Garmin for automatic imports or upload GPX/FIT files manually.
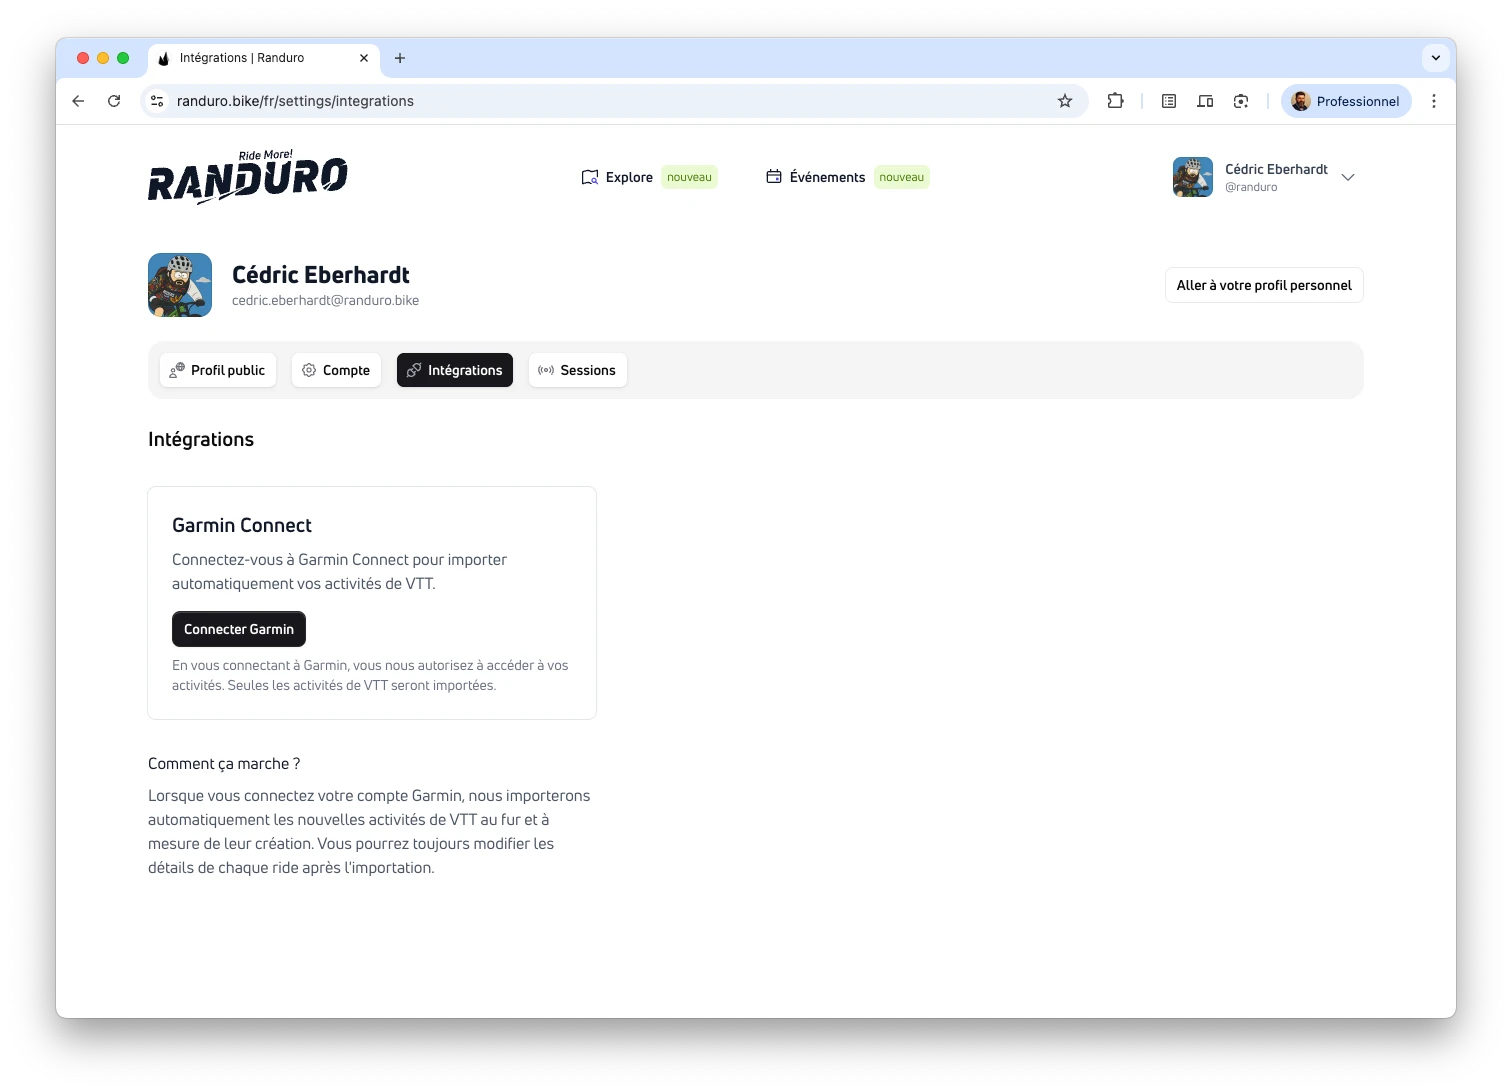
Garmin Connect
Connect Garmin to import new mountain biking activities automatically as they’re created. You can still edit ride details after import.
How to connect
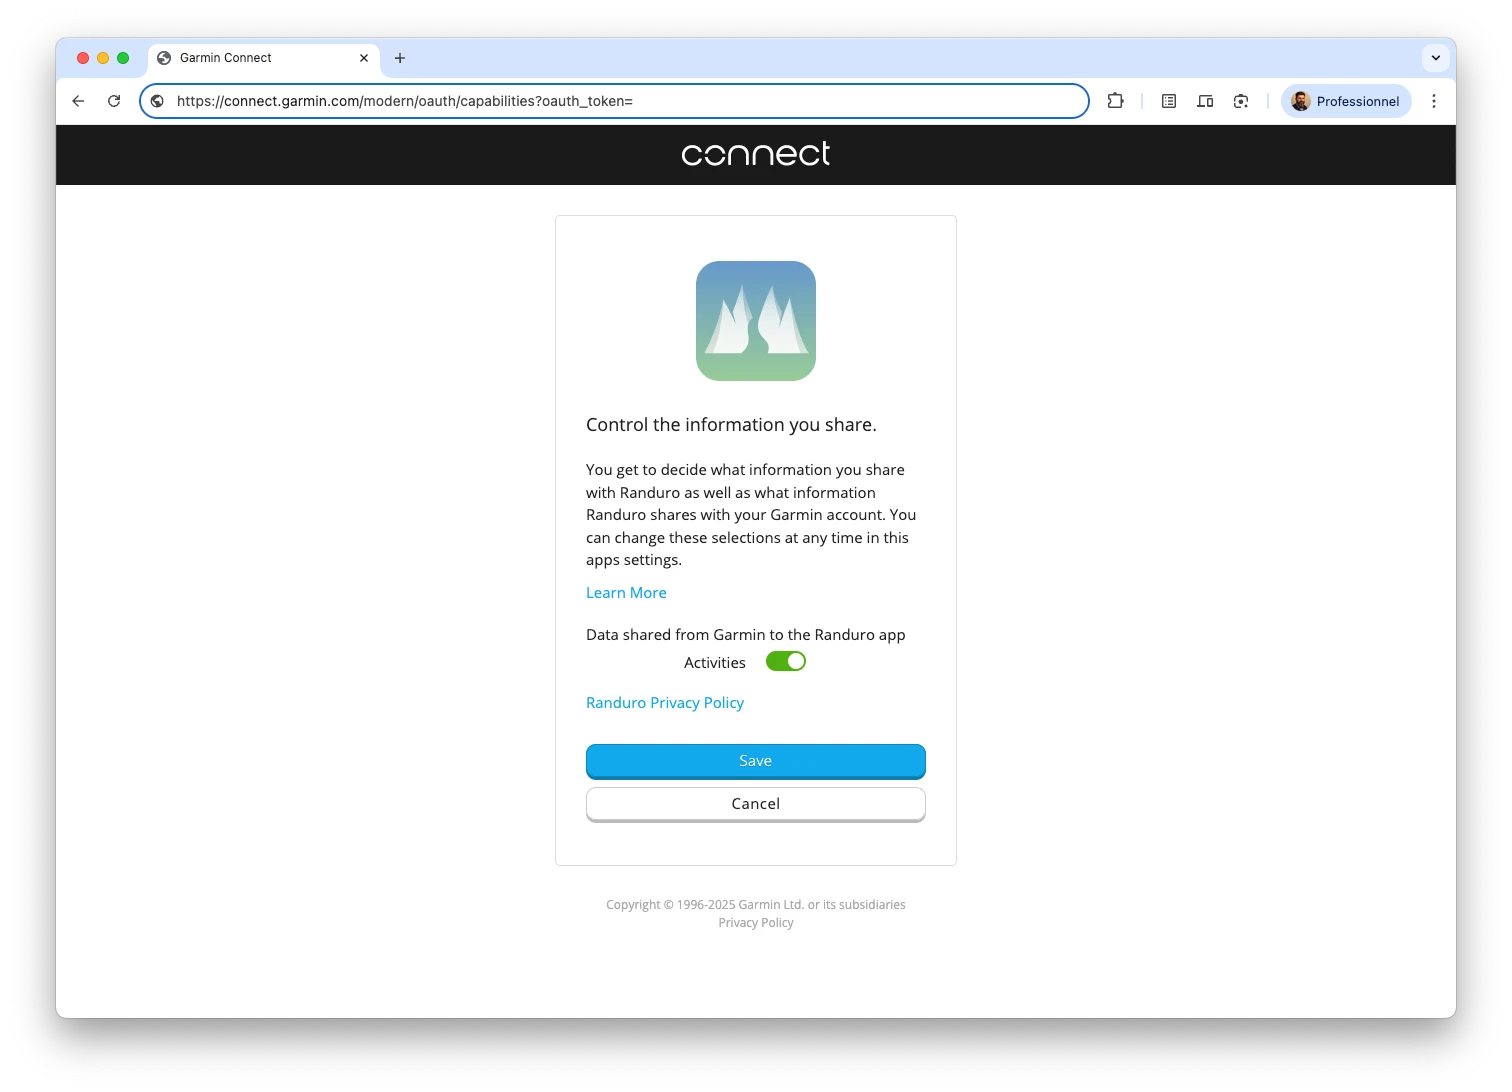
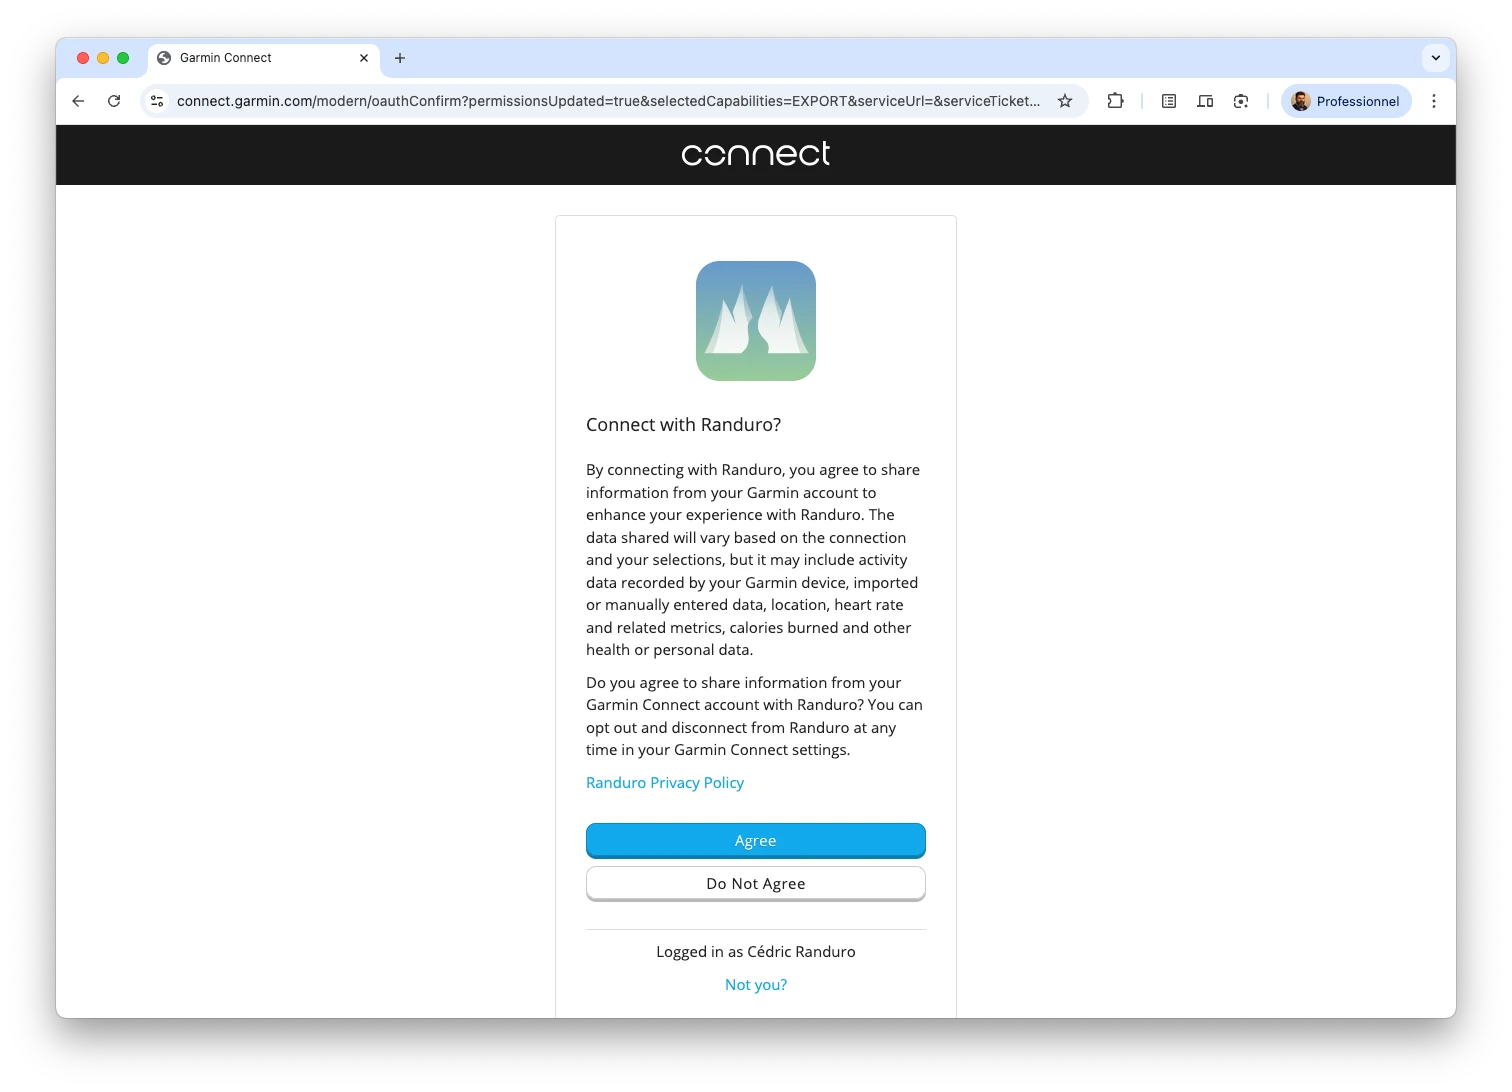
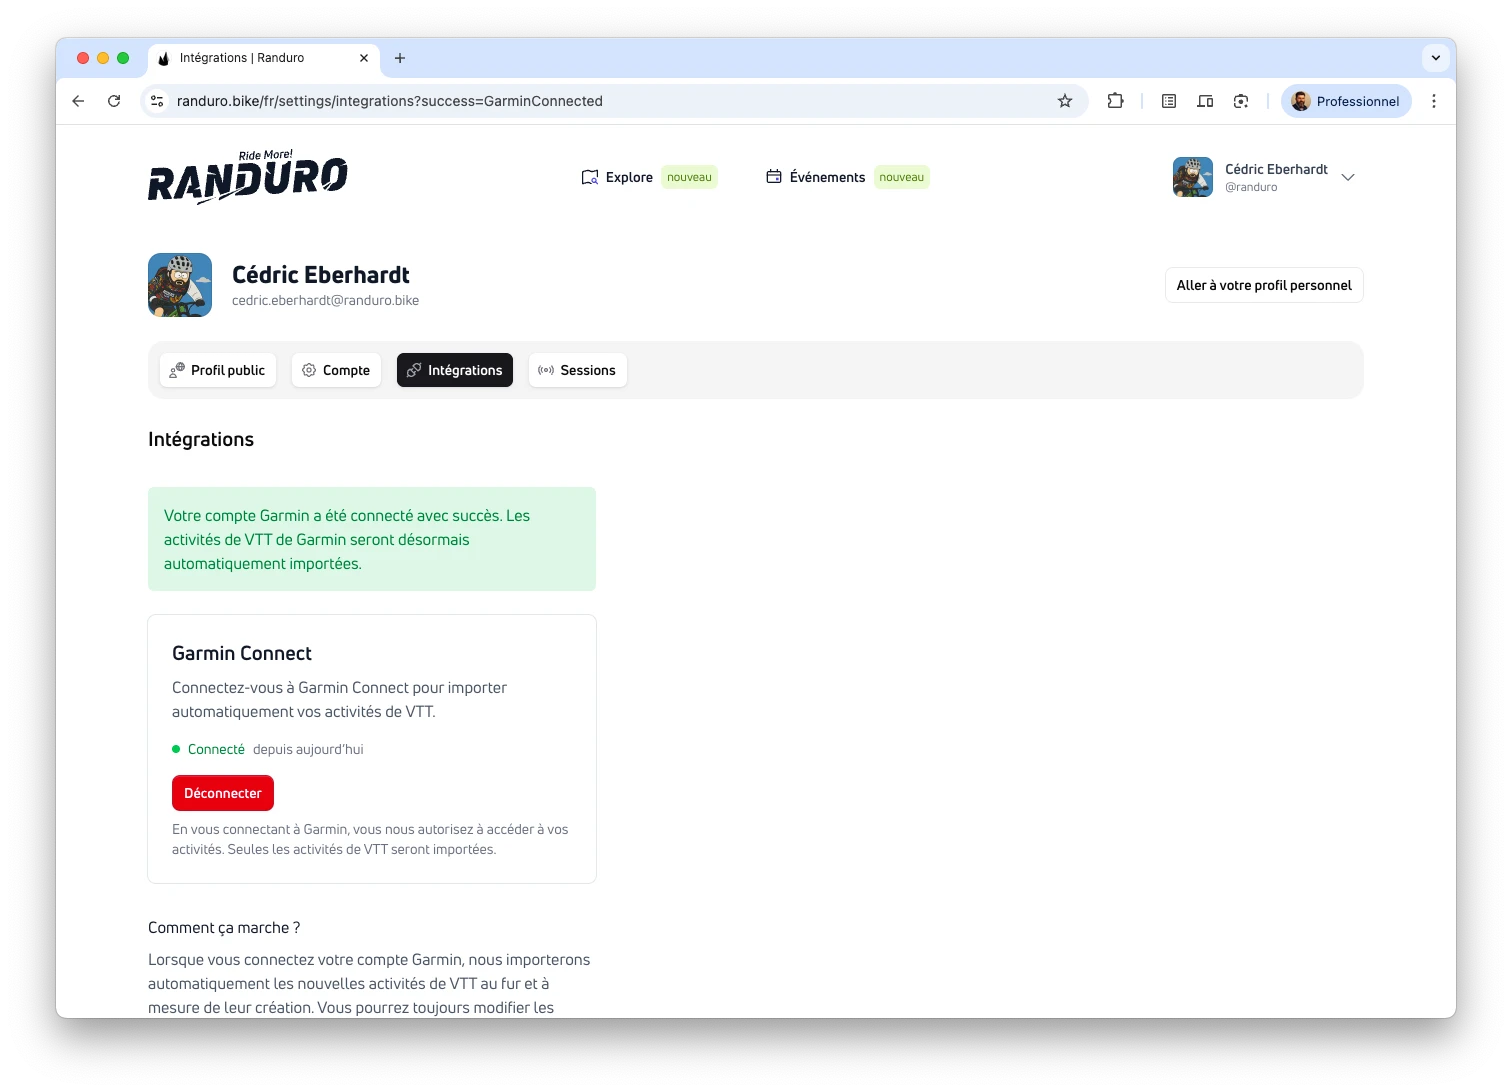
Open Settings → Integrations, click Connect Garmin, and follow the prompts. Sign in if asked, allow access, and you’ll land back in Randuro with “Connected” and a “since …” timestamp. Only mountain biking activities are fully imported. If your device records a ride as "Cycling" instead of MTB, Randuro saves the file in the background—change the activity type to Mountain Biking in Garmin Connect and it will automatically appear as a full ride. If the Garmin page sits for ~10 minutes, the request can expire—just restart from Settings → Integrations.
After connecting
New mountain biking activities you record after connecting import automatically, usually within seconds or a couple of minutes. When you connect Garmin, Randuro automatically queues a full historical import of your recent Garmin rides (processed in the background by our cron). Past rides can take a while to appear depending on how much history you have.
Historical data in Garmin Connect: During OAuth, or later under Settings → Connected apps → Randuro, turn on Historical data. Without it, only new rides after connecting will import. On Settings → Integrations you can re-trigger or extend the historical import with the Import past rides button.
Editing an activity in Garmin may sync back to the same ride in Randuro. If your watch classifies a mountain bike ride as "Cycling," Randuro pre‑downloads the file; correct the type to Mountain Biking in Garmin Connect and the ride will appear automatically with full track data. Uncorrected files are cleaned up after 30 days. Disconnecting stops future imports; imported rides stay in your account.
You can still upload older rides manually: export GPX or FIT from Garmin Connect and use the command palette (⌘K/Ctrl+K → “Upload a ride”) or the Upload a ride tile on your rider page.
What’s imported
New rides arrive with core stats (distance, time, elevation, speed), GPS track and elevation profile, device info (like the Garmin model), and heart rate when available.
Imported rides remain in your account if you disconnect later; disconnecting only stops future automatic imports.
Data attribution
Garmin‑sourced data is attributed as required (e.g., “Garmin [device model]” or “Garmin”).
Manual uploads (GPX/FIT)
Prefer files? Open the command palette (⌘K or Ctrl+K) and choose “Upload a ride,” or use the Upload a ride tile on your rider page. Drag & drop or select. GPX is universal; FIT is Garmin’s native format and keeps richer sensor/device data. Randuro accepts both—if you can, choose FIT for more detail.
If a file isn’t recognized as GPX or FIT, upload will fail.
Manual import from other platforms
Prefer manual control? Export rides from other platforms and import into Randuro. Great for past rides without relying on APIs.
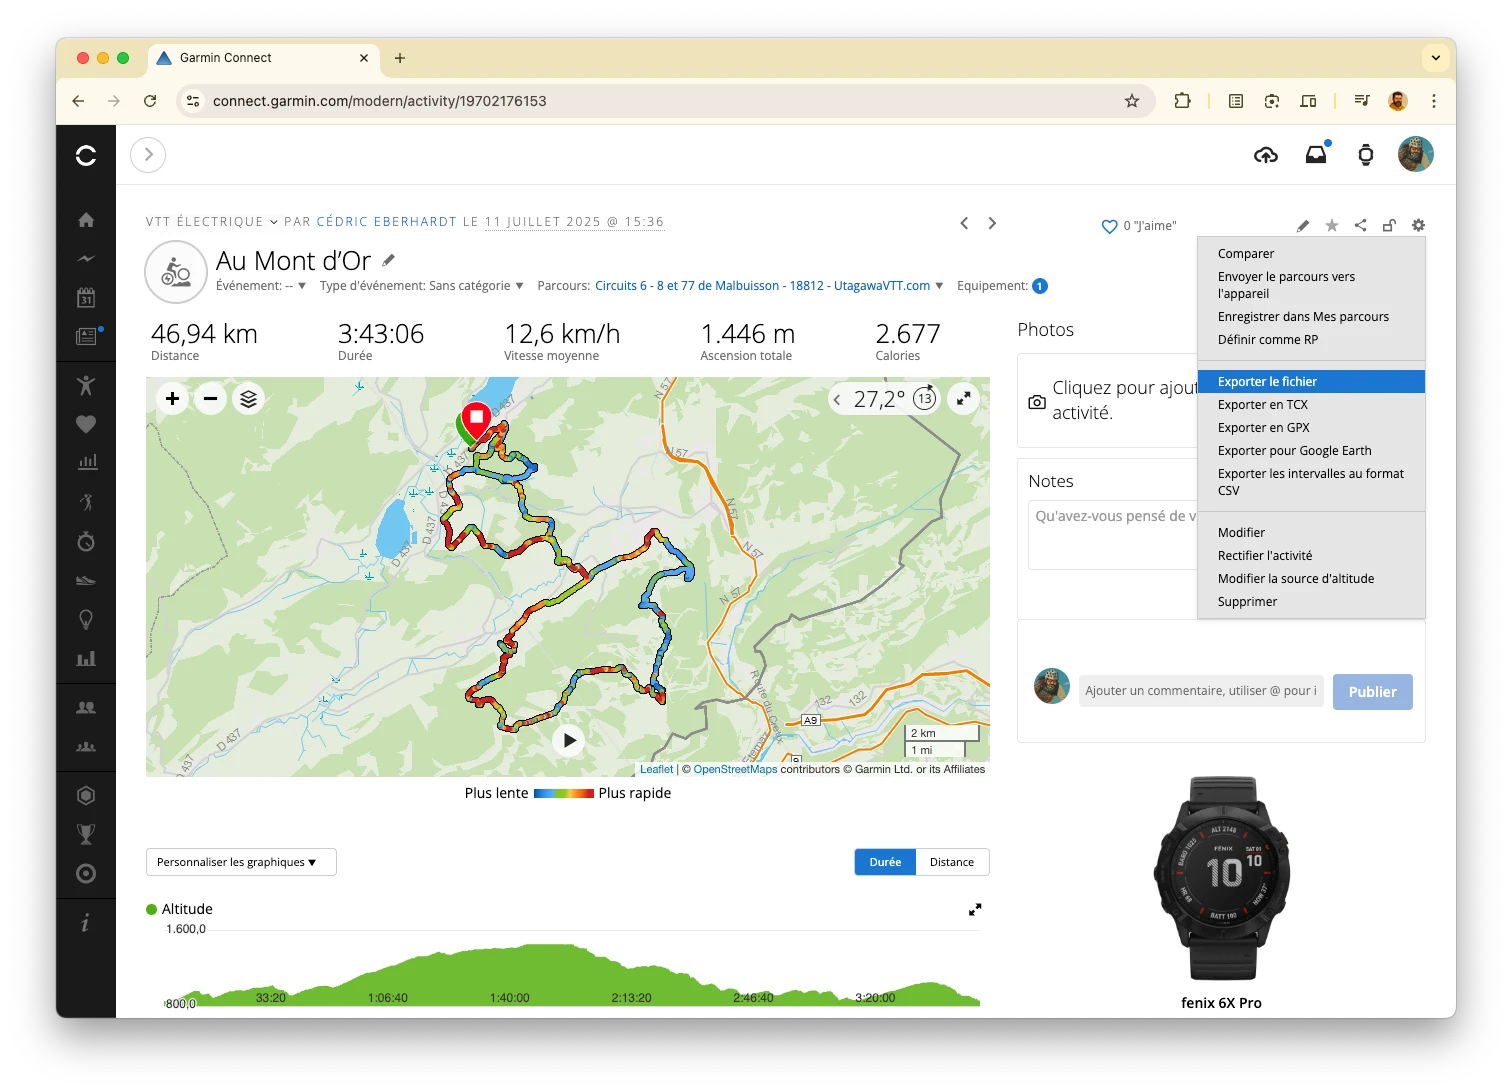
1. Garmin Connect
- Open your activity on connect.garmin.com
- Click the ••• (gear) menu and choose Export Original or Export to GPX
- If you chose Export Original: unzip the download to get the .fit file
- In Randuro: open the command palette (⌘K or Ctrl+K) to upload via “Upload a ride,” or use the Upload a ride tile on your rider page
Notes
- FIT preserves the most device/sensor details; prefer Export Original (.fit) when available
- Edits made in Garmin after export won’t sync back automatically
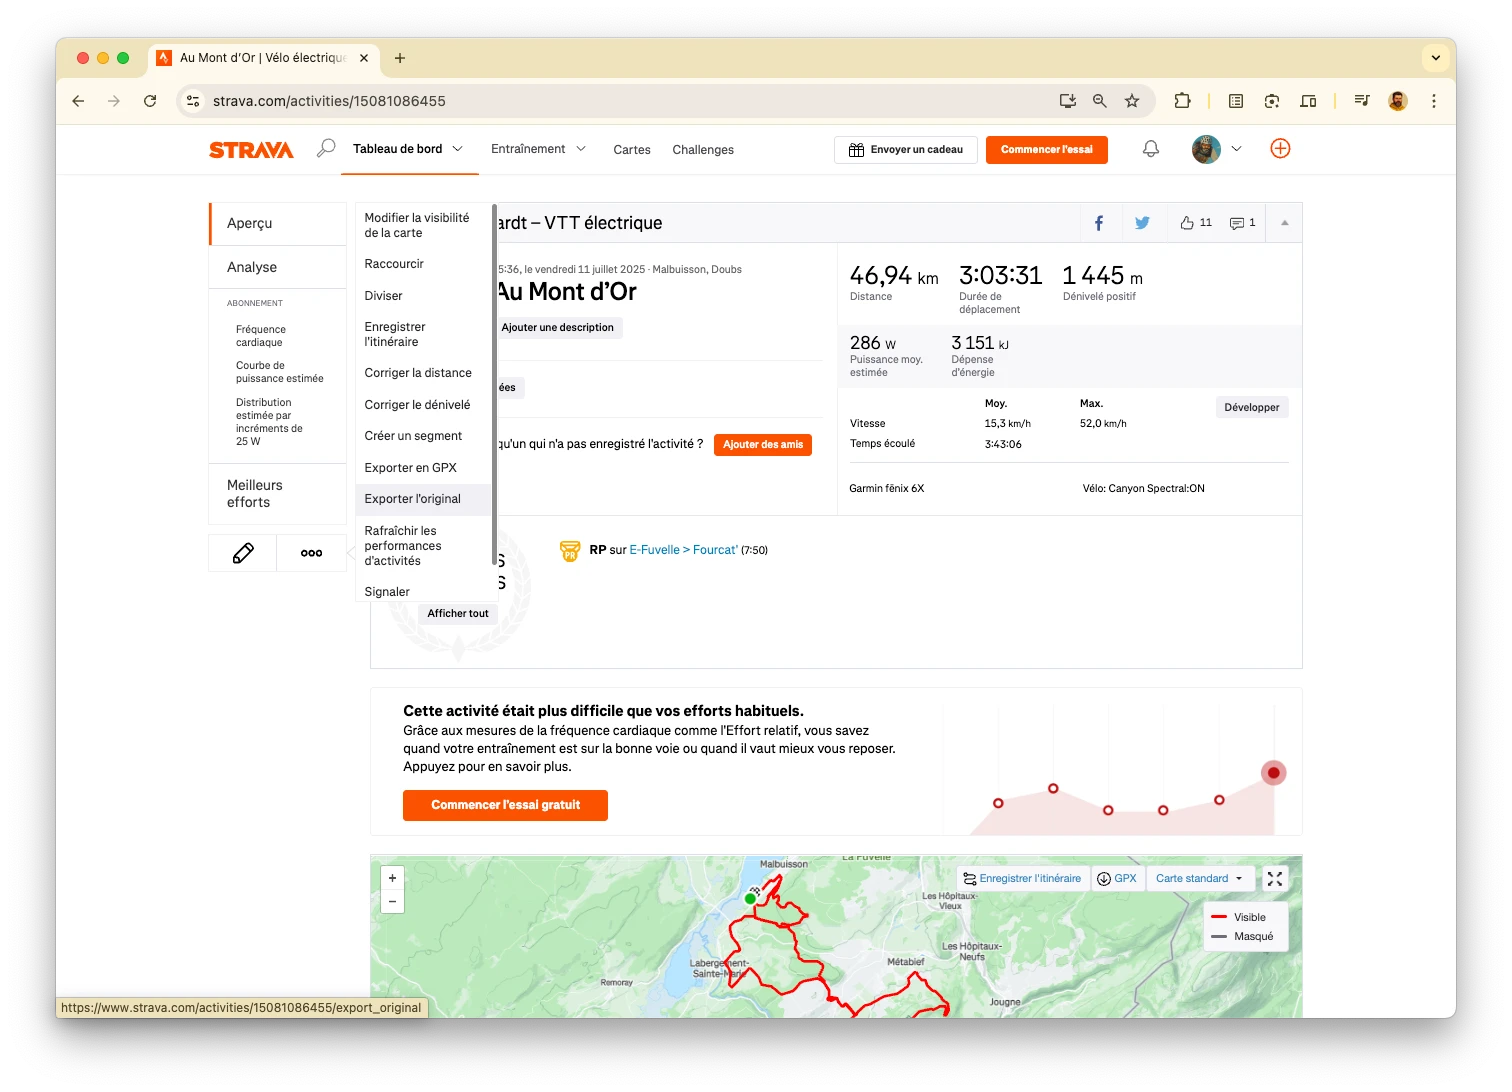
2. Strava
- Open your activity on strava.com
- Click ••• (Actions) → Export GPX; for FIT, choose ••• → Export Original (when available)
- Save the downloaded .gpx or .fit file
- In Randuro: open the command palette (⌘K or Ctrl+K) to upload via “Upload a ride,” or use the Upload a ride tile on your rider page
Notes
- Export Original returns the original upload (often .fit, sometimes .tcx) depending on the source
- GPX usually has the track/elevation but may miss sensor data
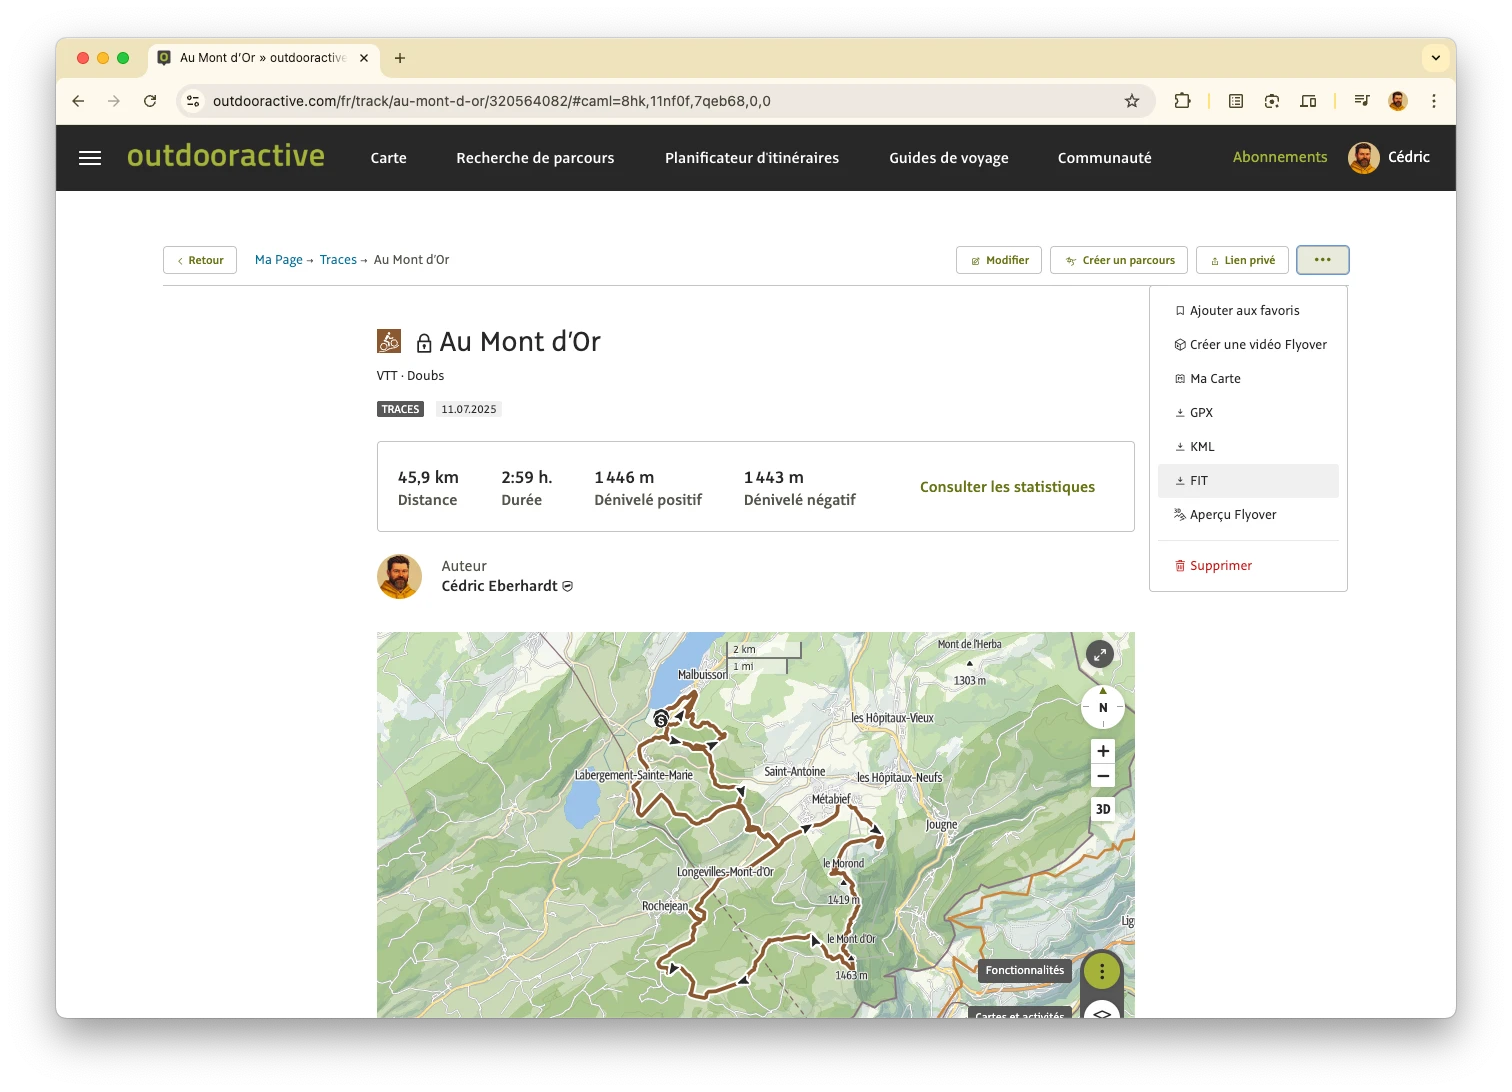
3. Outdooractive
- Open the Track on outdooractive.com (or in the app)
- Look for Download/Export and choose Export Original (if available) to get the original file (often .fit); otherwise select GPX
- Save the .gpx file
- In Randuro: open the command palette (⌘K or Ctrl+K) to upload via “Upload a ride,” or use the Upload a ride tile on your rider page
Notes
- Outdooractive exports GPX; you may need to be logged in to download
- Some exports are simplified; prefer “original/track” options when offered
General tips
- Randuro accepts .fit and .gpx; if you can choose, .fit carries richer device/sensor data
- If you receive a .zip, unzip to get the .fit before uploading
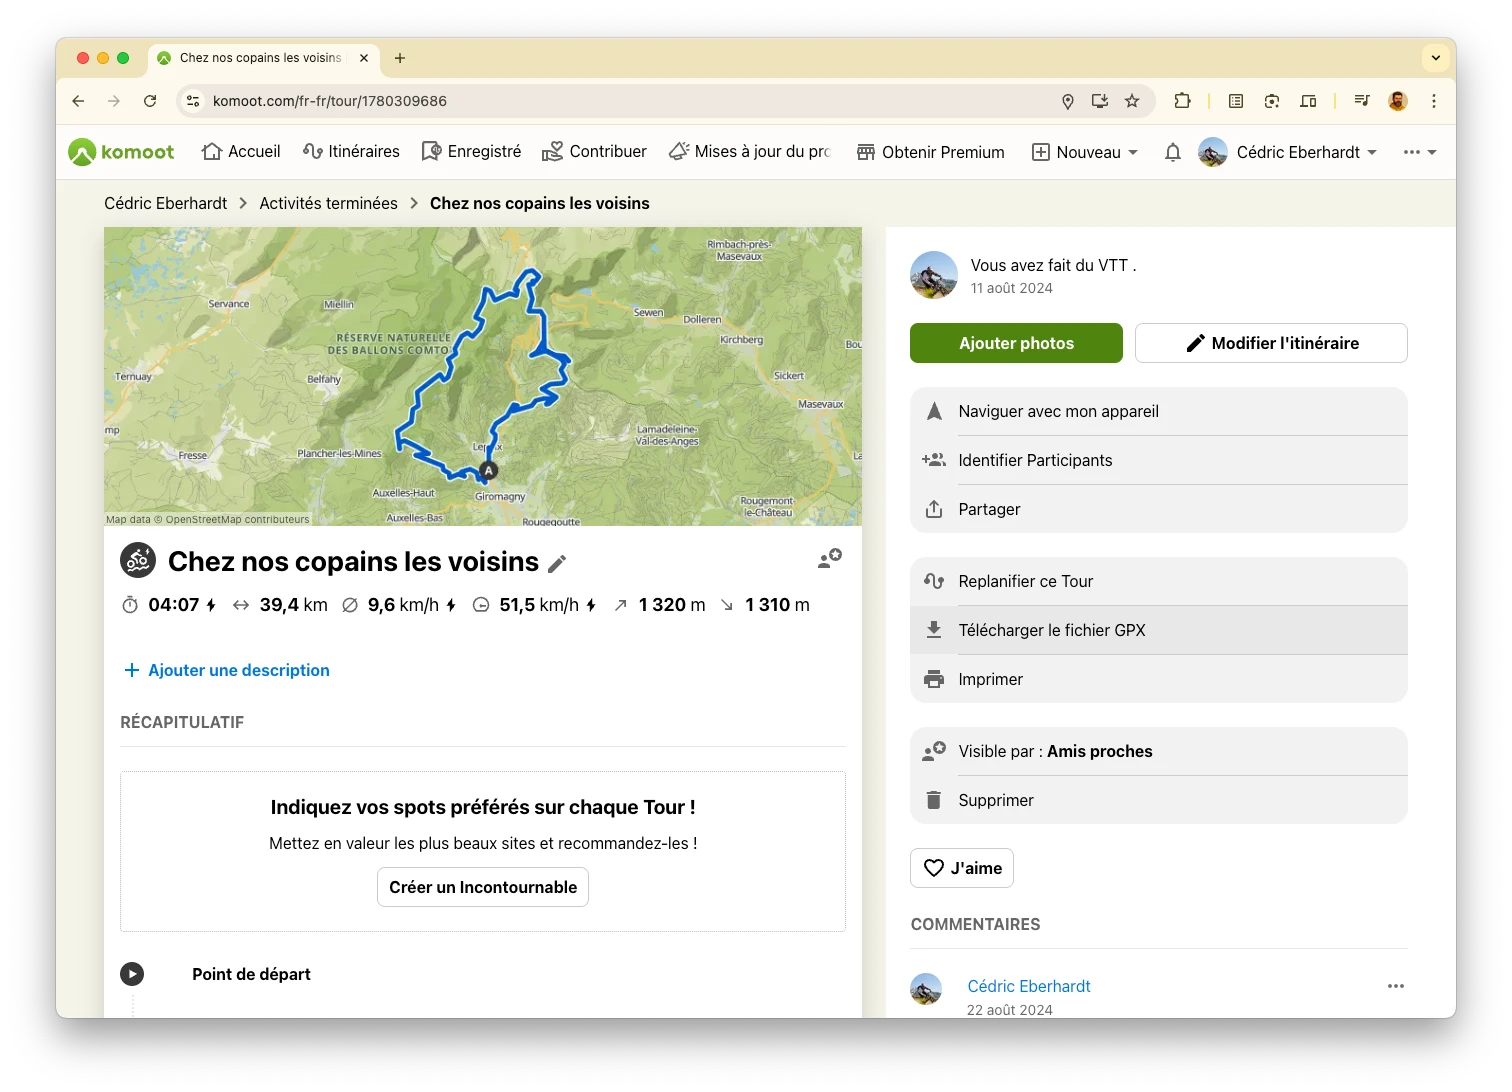
4. Komoot
- Open your Tour on komoot.com
- Click Download GPX (or Export) and choose the option you need (e.g., Complete track)
- Save the .gpx file
- In Randuro: open the command palette (⌘K or Ctrl+K) to upload via “Upload a ride,” or use the Upload a ride tile on your rider page
Notes
- Komoot provides GPX exports; FIT is not offered
- Exporting a planned route yields a route line without speed/heart rate; recorded Tours include the ridden track
Troubleshooting
If Garmin imports don't appear, check first: if your watch records MTB rides as "Cycling" (common on watches without a dedicated MTB profile), change the activity type to Mountain Biking in Garmin Connect—the ride will import automatically. Otherwise, disconnect/reconnect in Settings → Integrations and confirm you have recent activities in Garmin Connect. For file uploads, ensure the file is .gpx or .fit; if it still fails, re‑export from the source app and try again.